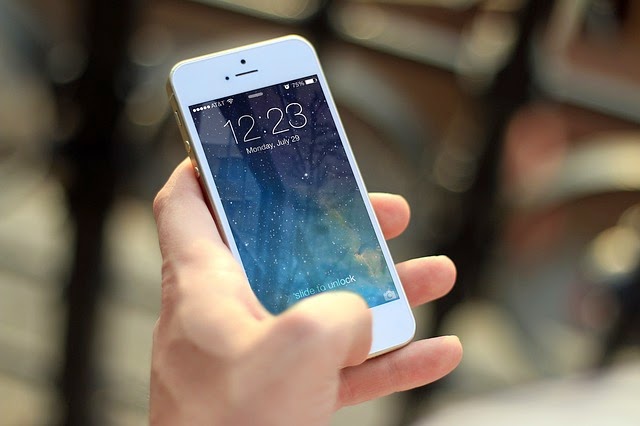
Android 5.0 Lollipop rolled out with a great user interface and a number of improvements in order to make Android devices run as smoothly as possible. Though there are already several devices that have been confirmed to receive this latest update, there are still some that weren't lucky enough to get Android 5.0 Lollipop. If you're one of those not-so-lucky Android users, your time to shine is now. Third-party developers have brought some amazing launchers that lets you get that Android Lollipop look on your device.

Let's take a look at these five great Android Lollipop launchers.

1. Blinq Lollipop Launcher


The Blinq Lollipop Launcher carries the Material UI, which makes your device look like it's running on the real Android 5.0 version. Whatever Android version you're device is currently running on, you can now achieve that Lollipop feeling on your device in an instant. The launcher allows you to create your own gestures, extreme customizations, more transition effects, and many more.

The Blinq Lollipop Launcher can be downloaded for free from the Google Play Store. It's one amazing launcher that you should not miss.

2. Epic Launcher (Lollipop)

One of the best looking Lollipop launchers you can get for your Android device is the Epic Launcher. With the support of "Ok, Google" keyword and a number of other goodies, it will surely give you a feeling that your Android device is already running on Android 5.0 Lollipop. This launcher allows you to specify custom icons and text sizes, locking and unlocking desktop, infinite scrolling, and so on.

3. Lollipop Launcher

The Lollipop Launcher can give you everything you need to transform your Ice Cream Sandwich or Jelly Bean-based Android device into a Lollipop version. Starting from the material UI to speed improvements, this launcher carries almost all the elements that can help you achieve your dream of having the newest version for your device. Aside from that, it supports the "Ok, Google" keyword to quickly launch the search panel for you. What makes this launcher worthwhile is the infinite scrolling and hand gestures. You can download the Lollipop Launcher for free at the Google Play Store.

4. Action Launcher 3

If you're in dire search of a great Lollipop launcher for your Android device, better check out the Action Launcher 3. With the combination of material UI and its own designs, anyone who will look at your device will think that it's a true Lollipop-upgraded one. For quicker access to your apps, Action Launcher 3 offers a unique feature called Quickdrawer that holds shortcuts to all of your apps. Just tap on any app to launch it.

Meanwhile, the launcher's Quicktheme feature combines the color of your wallpaper with the layout in order to create great blendings. For widgets, the Shutter feature lets you create widgets for your favorite apps with just your hand gestures.

Overall, the Action Launcher 3 boasts a lot of great Lollipop features, and it's so awesome because you can download this for free on Google Play Store.

5. KK Launcher

If you want something with handy features and a smooth interface, KK Launcher is perfect for you. This launcher is the solution for those looking a way to give their Android devices a neat Lollipop makeover. Some of the notable features include a handy sidebar, which lets you quickly jump to your favorite apps, "Ok, Google" support, more than sixteen transition effects, unread counts, and so on.

After installing the KK Launcher on your device, you'll notice that your device looks clutter-free, which is a cool and refreshing thing to see on your Android device.

Whether you haven't received the Android 5.0 Lollipop update or you don't want to switch to the latest version yet, installing one of these launchers should help you achieve all those fancy Lollipop features on your device in an instant. Try and see which one will really suit you best.


Windows is up for another big upgrade. Microsoft has finally developed a solution for all the frustrations and confusions brought about by Windows 8. From a big comeback of the Start Menu to new multitasking tools. Here's a sneak peek of what you can look forward to in Windows 10, which will be rolled out by mid-2015.

1. Start Menu is Here to Stay
Microsoft has finally brought back the most sought-for Start Menu. What's new with this feature is that when you click on the traditional Start button, you'll be seeing two panels side by side -- the left panel showing the pinned, recently, and most used apps. There's also a power button at the top for the Hibernate, Standby, and Shutdown options, as well as an all apps option like with Windows 7. While the right panel features a selection of live tiles, which you can customize, resize, and re-organize according to your preference.

2. Universal Search in Start Menu
The Search tool, found at the bottom of the Start Menu, has also been improved. It now not only searches your programs and files, similar to how it does in Windows 7, but it also looks up related results from the Internet. What's good about this is that you won't have to open up a browser in order to find a particular Wikipedia entry. However, there's no accurate information as to what other sources the Universal Search will get from.

3. Multiple Desktops
This feature is similar to Apple's Spaces feature on Mac OS X, which assists you in managing multiple open windows and apps. So instead of having multiple windows open on top of each other on your desktop screen, you have the option to set up a whole other virtual desktop for those programs to occupy in. Set up one specifically for home and leave your other apps like Netflix and Amazon open, and create another desktop for work in which you keep programs such as Word, Excel, and Internet Explorer open.

4. Task View Multitasking
With Windows 10, there's a new way to keep track of your open apps. You can either hit the new Task View button on the taskbar or swipe in from the left edge of the screen to pull up a one-page view of all your open apps and files. It's somehow similar to the Alt-Tab key combination, but this provides a convenient way for touch-oriented users to get an overview of what programs are running.

5. Enhanced Start Screen

Back in Windows 8, the Start Screen is the touch-optimized page for all the live tiles and apps in which the OS became famous for. Now, the improved Start screen comes with a persistent taskbar and a list of programs and folders on its left panel. This gives Windows 10 users to have easy and quick access to common locations such as My Documents or PC Settings straight from the home screen, and it also allows an easy way to find a particular app with the help of the All Apps option at the bottom.

6. Smoother Snap View Feature
Microsoft has also improved that Snap View multitasking feature, which allows you to dock windows to the four corners of your screen. If you could split your display between up to four apps at a time previously, the number of apps you could have side-by-side was dependent on your screen size's resolution.


There's no definite information as to whether this quadrant snap view is dependent on your resolution, but this improved way of docking your apps will surely boost your productivity. The system will even suggest what other open apps you can use to fill up available space, if there's any.
For most people, their iPhone is the most important thing they own. It holds a lot of important data, from contacts, personal photos and videos, playlists, emails, financial information, and so much more. And if you are one of those who love to use their iPhone as their primary camera, then you will have tons of precious memories you wouldn't want to lose. That is why it is very important to always back up your phone's data, not only because you will be updating the operating system or upgrading to the latest iPhone model.

Before you go about backing up your iPhone, remember these 5 simple reminders to ensure that your data are backed up correctly and that your data are secured before upgrading to the latest iOS.

1. Make Sure Your Contacts, Messages, and Calendars are Backed Up
Before you back up your iPhone, do make sure that your contacts, messages, and calendars are backed up to iCloud or Gmail. This will ensure that you will not lose any of your important contacts, text and email messages, as well as important appointments set on your calendar.

To do this, simply go to Settings > Mail, Contacts, Calendar. From there, tap the account you use to save data (iCloud or Gmail), and then make sure Mail, Contacts, Calendars, and Notes are all toggled on.

2. Back Up Your Photos and Videos to Cloud
Syncing your iPhone to your Mac or PC is not enough these days. You also need to back it up to make sure you will always have a copy of your personal photos and videos since Photo Stream on iCloud will only store up to 1000 photos in cloud for 30 days. Since that is the case, you are liable to lose these photos unless you have a copy saved on a disk.
To make sure your photos and videos are properly backed up, use Dropbox, OneDrive, or other services like Google+ Photos. These cloud storage apps not only store your photos, but they also have an auto-upload feature that allows you to automatically upload your photos to cloud when you're connected to Wi-Fi, without even opening the app.

3. Back Up Your Photos to Mac Using Image Capture
Some might say backing up your important data to multiple locations is pretty extreme. But, it is better to be safe than sorry, is what I often say.

Image Capture is a built-in utility found in Mac OS. It enables you to upload pictures from your iPhone, iPad, iPod touch, digital cameras, and scanners that are connected directly to the computer or to the network. In Image Capture, you can select the photos you want to save, including their destination. You can save them to your computer and/or to an external hard drive.

4. Back Up Your Photos and Videos to a Windows Computer
Backing up your photos and videos to a Windows computer is very easy. All you need to do is follow these simple steps:

STEP 1: Connect your iPhone to the Windows computer using the cable that came with it.

STEP 2: Once your iPhone is detected, open Computer, then right-click your iPhone's drive, and then click Import pictures and videos.

STEP 3: When the Import Pictures and Videos window appears, select the destination where the photos and videos will be imported.

NOTE: You also have the option to delete the photos and videos from your iPhone once they are imported.

5. Back Up iPhone to iTunes
iTunes can be used to back up your entire iPhone. When you use iTunes to back up your iPhone, it will clone your entire device, and that includes your apps, settings, photos, videos, music, etc. To do this, simply follow these steps:

STEP 1: Open iTunes. Make sure you have the latest version installed. You can download the latest version here.

STEP 2: Plug your iPhone to your computer (Mac or PC) using the USB cable it came with.

STEP 3: Once your iPhone is detected, click File, and then click Devices.


STEP 4: Click Back up.


It's hard to keep things private these days, especially on our smartphones. Even children as young as two know how to navigate through a smartphone. Privacy has become a privilege you need to hang on to as much as you can. So to avoid others from snooping into your recent contacts and messages, check out Shady Contacts.

Shady Contact is a free Android app that aims to keep sensitive call logs and text messages concealed from prying eyes. It helps you to keep specific contacts off of your phone’s call logs and messages by putting their calls and texts in a separate area.

Shady Contact has a PIN or pattern unlock feature and can be configured to self destruct, taking all data with it if the wrong code is entered a set number of times.

To learn more about how to hide private calls and text messages from nosy people using Shady Contact, check out the steps below:

Hide Private Calls and Texts from Nosy People Using Shady Contact on Your Android Phone

First, download and install Shady Contact from the Google Play Store free of charge.

Once you have installed Shady Contact, set up a custom pattern or PIN code lock to protect the contents of the app.


You will then be taken to the Calls section where you can start adding the contacts you want to hide. You can also hide any phone number on the list. Once a number or contact is included, all information sent or received from said number or contact will be stored inside the app and not in Android's stocks app. To do that, swipe twice to the right to bring up Contacts, then tap Add Contact to begin selecting the contacts whose calls and messages you would like to hide from prying eyes.


You can also hide the Shady Contact's app icon from your phone, so others will not know that you have it installed.


You can access the app by dialing ***123456###.


Because of trying times nowadays, small personal belongings suffers the risk of getting stolen -- mobile phones, flash drives, tablets, and even laptops. Having to experience losing your very own laptop can be awfully painful, especially if you depend your school work on it. To help you get your beloved laptop all the way through school with you, here are some tips that you can use as a guideline to keep your laptop safe and secure from lurking thieves on your campus.

But before we go any further, it is a must to have a backup system and use it regularly. Perhaps you can get a reliable and spacious external hard drive or subscribe to an online backup service, and back up your laptop's data on at least a weekly basis. This way, you won't lose your study notes, term papers, photos, music, and other key data should your laptop gets lost or stolen.

Here are five simple yet essential ways on how to keep your laptop secure.

1. Insure your laptop
You can purchase a separate renter's insurance policy for your laptop, since it can already be considered a valuable personal investment. You may want to check out College Student Insurance or NSSI as your insurance options for your laptop. Alternatively, you can also consider the idea of adding a rider to your parents' home insurance policy.

2. Register your laptop with campus safety
Another way to secure your laptop is by registering it with your college or university. Most of the time, you will be issued a sticker to be placed on your laptop that will serve as a theft deterrent. In case your laptop gets misplaced or stolen, your registration information will help your school trace it and have it returned to you easily.

3. Lock your laptop when you need to go away
It is imperative not to leave your laptop in public places at all times. However, if the need arises wherein you need to go to the bathroom or buy something in the school cafeteria, it's better to take your laptop with you (that's the main reason why it's made portable, right?) Otherwise, use a Kensington lock or other cable lock to secure your laptop to a fixed object before leaving the area.

And don't think that leaving your laptop in your car is a good idea, either. Even if you have skillfully hidden it underneath a sweatshirt or duffel bag, there's still a great risk of getting it stolen. Take it with you wherever you go or hide it safely in your locker.

4. Always lock your dorm room or apartment
If you need to go somewhere else and you don't need to use the laptop, make sure to lock your dorm room or apartment if you and your roommates are going to stay outside for a while. If you noticed that your dorm buddy has a habit of losing his or her dorm keys, it's better to get your laptop a laptop safe. In case somebody breaks in to your room, there's no way the thief can steal your laptop when it's in the laptop safe.

5. Install a tracking software
To complete your security measures for your laptop, install a tracking software. LoJack is one of the most competitive tracking software around. It uses a tracking system that utilizes GPS and Wi-Fi technology to track down thieves. Another software that uses Wi-Fi technology to recover stolen or lost laptops is GadgetTrak. It has a webcam usage that periodically takes photos once the software is activated. When thieves turn on the laptop, connects to the Wi-Fi, GadgetTrak takes a mug shot and police can track them down in no time. It also supports both Windows and Mac systems. You can purchase it for $19.95 or get a 30-day free trial.

If you really love and value your laptop, follow these simple tips and we assure you that your laptop will stay with you, through thick and thin, for many years to come.
In this day and age, almost everyone has a cellphone. As useful as they are, they sometimes become irksome when they ring at the most inopportune time. Be it during a class session, a corporate meeting, at church, or while watching a movie, having your phone ring loudly in a quiet environment can be very embarrassing for you, but also quite annoying for the people around you.

With Windows Phone 8.1, it is now easier to silence and adjust your alerts and ringers. It even makes it easier to control your music volume. If you want to know how to easily turn off your ringers and alarms, check out the steps below:

Easily Turn Off Ringers and Alarms in Windows Phone 8.1
Press the volume up or volume down button to bring out the Ringer + Notifications drop-down.

Open the volume bar by tapping on the arrow down icon located on the top right corner of the screen. The volume bar houses the more advanced options for your ringer and media.
From here, you can adjust the volume levels of the sound you want by moving the slider from left to right. You can also turn vibrate on or off by tapping VIBRATE.

Since we want to turn off the ringers and alarms or notifications, move the Ringer + Notifications slider all the way to the left, or simply tap the bell icon.
The same process applies if you want to turn off the media and apps sounds. Simply move the Media + Apps slider or tap the musical note icon.

If you want to turn off the vibrate feature, tap VIBRATE ON.

That's about it! Your Windows Phone is now silence. Another good thing about this is that you can do this from the Lock Screen. So you can mute your phone easily without having to enter your PIN code.

___________________________________________________
Fro more tech tips and troubleshooting techniques: Click Here


At last, you finally bought your very first laptop computer. You carefully pull it out of its box and then fire it up for the first time. Next, you go through the Windows setup and you're all set. Wrong! Your brand new laptop is not yet good to go unless you perform some other tweaks to make it perfectly your own. Below are some handy out-of-the-box laptop tips that you may find useful, especially if you're a first-time owner of a brand new laptop.

TIP #1: Run All Windows Updates
Regardless of how recent your notebook computer since its date of release, there are still lots of Windows updates you may need to install since then. There's a big possibility that the minute you power on and connect your notebook to your network, it will automatically download the updates. However, it may be ideal to configure your laptop to get Windows updates to download manually onto your laptop's system. So here's how to do it:

On the Start Screen, click on the search icon (magnifying glass), then type "windows update" on the search field. Next, click on Check for updates from the search results, then click on the Check now button to start searching for updates on the Internet. If the software finds any new updates, click on View details, then check the Select all important updates box before hitting the Install button.

TIP #2: Transfer Files and Programs from Your Old Computer

Your laptop will feel yours once it contains all the important data and favorite applications. Depending on how many files you have on your old computer and where you stored them, this process may actually take a while to finish. Services like Dropbox can make the transfer easy if you've already backed up your old computer to the Cloud. Otherwise, you can use an external hard drive or a USB flash drive to move your files and applications back and forth. Make it a point to get all the contents on your Pictures, Music, Video, and Document libraries.

TIP #3: Install the Latest and Greatest Browser(s)

Windows 8.1 is bundled with a fresh copy of Internet Explorer 11 that automatically updates though there are a number of users who prefer Google's speedy Chrome browser or Mozilla's very flexible Mozilla Firefox browser. Download whichever browser you feel comfortable using with to start surfing the Web.

TIP #4: Install Some Great and Useful Freeware

It would be awesome if your new laptop is packed with new and powerful software as well. And since you just pulled it out of the box, this would be a perfect time to start installing some programs that will help you make the most out of your laptop. Check out these software that will be a great addition to your new portable system:
  • Windows Essentials - Microsoft's free software pack for the desktop UI features a great email client, a competent video editor, an instant messaging app, blogging software, and a photo editor.
  • Paint.NET - This software is a great alternative to Photoshop; providing a simple yet powerful image editing interface.
  • Filezilla - This is the perfect tool if you need to upload or download files to and from an FTP server.
  • WPS Office - This program is a free office suite that has a word processor, spreadsheet, and presentation application that can open and edit Microsoft Office-compatible files. Some new PCs come with a trial version of MS Office 2013, but WPS is totally free.
TIP #5: Pin and Create Hot Keys for Your Favorite Apps

Once you're done with installing all your favorite software, it's time to pin their shortcuts to both the Start Screen and the desktop taskbar to make them easier to launch. Creating hot keys for these apps is also great so that you can launch them without lifting your hands off of your keyboard. Here's how to accomplish this task:

Let's deal with creating a hot key first. Right-click on any desktop mode shortcut, then select Properties. Next, enter a key combination in the Shortcut key field, and then hit [Enter]. It would be better to use [Ctrl] + [Alt] + a key in order to avoid any conflict with other apps' shortcuts.

Next, pin your app's shortcut to the taskbar by right-clicking on a shortcut in the apps menu, Start Screen, or the desktop, and then selecting Pin to Taskbar. The icon of the app will take a permanent place on the desktop taskbar. If you want to pin the app to your Start Screen, right-click on a shortcut, then select Pin to Start. The app's icon will appear on the Windows 8 Start Screen afterwards.

TIP #6: Uncombine Your Taskbar Icons
Windows 8.1's desktop mode combines an applications' windows into a single taskbar icon with no descriptive text by default, which makes the taskbar look more like the Dock in Mac OS X. This can be difficult for some to keep track of the windows or distinguish between a pinned shortcut and a running program. To get separate icons for every window, right-click on an empty area of the taskbar, then select properties. Click the drop-down menu next toTaskbar buttons, then select Never combine. Click the Apply button to save your changes.

Those are just some of the things you can do after getting your laptop computer right out of the box. This will make it more easier, personalized, and enjoyable to use because you've just customized it the way you want to it to be.